This Web Page Will Send You on the Adventure of a Lifetime - Find Out How

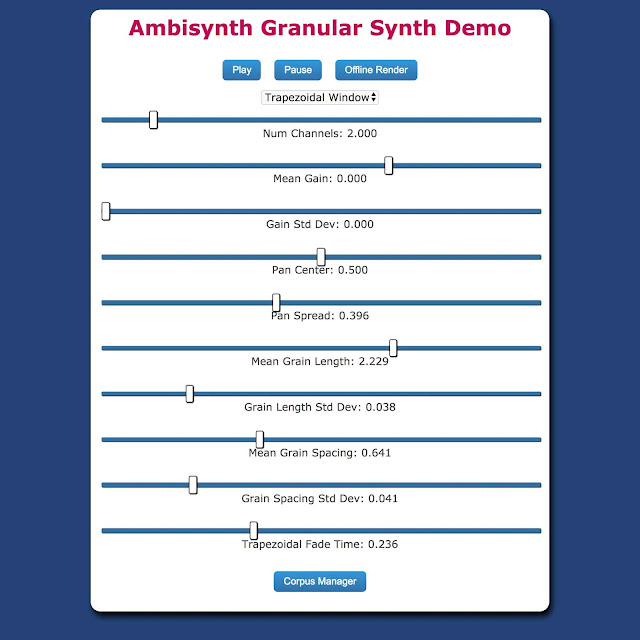
Figure 1: Interface for the synthesizer.
Introduction
The granular synthesizer I made for a previous post generated some interest, so I made a web-based version so it could be used more easily. I am not going to post a link to it here, because we might try to monetize it later, but I am creating this post as a way of documenting my work.The code for this demo is in a private repository.
Example 1: Audio generated by the synthesizer with the default settings.
Theory of Operation
The granular synthesizer loads in a corpus of recordings. It then randomly chooses small pieces (grains) out of the recordings, fades the pieces in and out, and and pastes the pieces randomly into the output audio stream, potentially with the pieces overlapping one another. There is a good basic description of granular synth here. The pieces are inherently mono; if a piece comes out of a multichannel recording, then the piece is taken from one randomly selected channel. If the output stream has more than one channel, the mono piece is panned to a random location between two consecutive channels in the output stream.Parameters
The following parameters are saved semi-permenantly in your browser, so refreshing the page will not reset them.- Window Function: The shape of the fade-in / fade-out curve applied to the pieces. There are graphs of these on Wikipedia.
- Num Channels: The number of channels in the output stream (e.g. the number of speakers in your setup).
- Mean Gain: The average gain, in dB, of the grains. Gain is chosen and applied separately for each grain, and is constant over the life of the grain.
- Grain Gain Std Dev: The amount of variability, in dB, in the gain of the grains. 0 would mean all of the grains have the same gain, and 1 would mean that 95% of the grains will fall within ±3 of the mean gain.
- Pan Center: The average pan location, of grains. This assumes your speakers are in a linear array. 0 is hard-left and 1 is hard right for any number of channels. Pan is chosen and applied separately for each grain, and is constant over the life of the grain.
- Pan Spread: The amount of variability in the pan of the grains. Pan is chosen over a flat distribution within ±spread of the center. 0 would mean all of the grains are panned to the same place, and for a center of 0.5 (in the middle of the field), 0.5 spread would mean grains are chosen with an even distribution between hard left and hard right.
- Mean Grain Length: The average duration, in seconds, of a grain.
- Grain Length Std Dev: The amount of variability, in seconds, of the grain durations. 0 would mean that the grains are all the same duration, and 1 would mean that 95% of the grans will be within ±3 seconds of the mean duration.
- Mean Grain Spacing: How frequently, on average, new grains are chosen from the corpus and placed into the audio stream. 1 would mean that a new grain is chosen every second on average. Notice that if the grain spacing is less than the grain duration, than grains will overlap.
- Grain Spacing Std Dev: The amount of variability, in seconds, in the grain spacing. 0 would mean the grains fit perfectly on a grid. 1 would mean that for 95% of the grains, the space between the grain onsets will be ±3 seconds of the average space.
- Trapezoidal Fade Time: This applies only to trapezoidal window functions. If you are using a trapezoidal window, this will be the fade in and fade out time, in seconds, of the window. The fade will be internally limited to half of the grain length, for each grain, resulting in a triangle with height 1.
Download
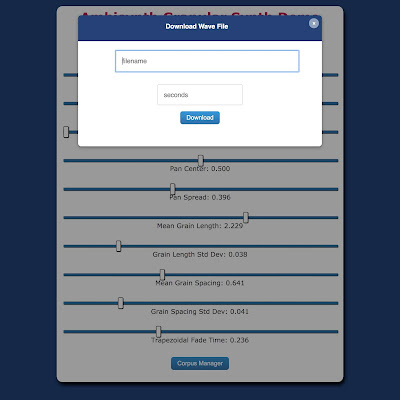
Synthesize wave files offline and download them to your computer. Just choose a filename and how many seconds of audio you want to generate and press the Download button. A wave file will be downloaded to you downloads folder. This is not working on Mobile Safari (it does work on Android).
Figure 2: Interface for offline render of wave files.
Corpus Manager
Load a corpus of audio files saved to your computer. Click on the Corpus Manager button to open the Corpus Manager.
Figure 3: Default view of the Corpus Manager.
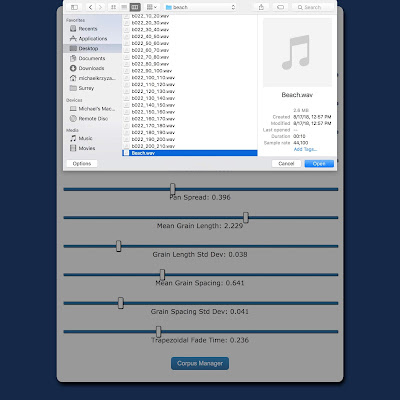
The slider there is disabled if there is only one corpus. Click the "Choose Files" button, and then choose one or several audio files from your computer.

Figure 4: View of the Corpus Manager while selecting files.
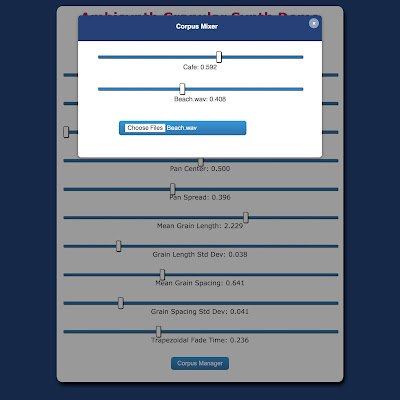
The synthesizer will store these as a new corpus, without overwriting the original one, and a new slider will appear for the new corpus. The sliders can be used control the probability that a grain will be selected from a particular corpus. This allows you to mix and crossfade between different corpora. Moving one slider will cause all of the sliders to move, because new grains have to come from somewhere, meaning the probabilities must sum to one.

Figure 5: View of the Corpus Manager while crossfading between corpora.
You may add as many corpora as you wish, within the limits of your computer's memory. There is currently no interface for removing a corpus once it has been added, except for refreshing the page.


Comments
Post a Comment